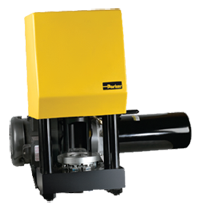
Crimping instructions | Parker Superkrimp and Parkrimp 2
How to crimp a Parker hose assembly using Parker Superkrimp and Parkrimp 2:
For crimping instructions on other Parker crimpers, see How to crimp with Parker Minikrimp, Karrykrimp, Parkrimp 1, Karrykrimp 2 and PHastkrimp.
How to crimp – Step 1:
Mark insertion depth and push onto fitting

Mark the hose insertion depth and push hose into fitting until the mark on the hose is even with the end of the shell. Lubricate hose if necessary, however, DO NOT lubricate if using Parker spiral hose. See Hose Insertion Depth table below.
If crimping Parker 81 series shells with Parker 88 series fittings:

Place shell onto end of hose and make sure the end of the shell lines up with the insertion depth mark. Push hose onto the 88 Series fitting until the shell bottoms against the fitting’s stop ring or hex. Lubricate hose if necessary.
How to crimp – Step 2a:
Utilizing small unitized dies

With the pusher in the full up position, lift the back half of the split die ring. Lock it in the up position by pushing the slide pin in. (The slide pin is located inside the pusher at the back of the crimper.) |

Lubricate die bowl using a premium quality lithium-base greases. Carefully insert the adapter bowl, 83C-OCB, into the base bowl. The adapter bowl must be tilted toward the back of the crimper during insertion. |

Lubricate die bowl using a premium quality lithium-base grease. Place unitized die-train into the adapter bowl. Select die and die ring by hose size and type. See decal on crimper for proper die set. If you do nothave one, download The Crimp Die Selection Chart for your crimper. Note: Die sets have color-coded cavities indicating size and have the fitting series and dash size stamped on the top. |
How to crimp – Step 2b:
Utilizing large two-piece dies

Insert the proper die set into the die bowl. (The die sets are in two halves of four dies each. Place one half in the back and one half in the front to accommodate bent tube fittings.) Reference Parker Crimp Die Selection Chart for proper tool selection.
How to crimp – Step 3:
Place spacer ring

If required, place spacer ring on locating step of adapter bowl before crimping hose assembly. See Parker Crimp Die Selection Chart for tool selection.
How to crimp – Step 4:
Position the split die ring
|
Lower the back half of the split die ring onto the dies by pulling the slide pin forward. |

Insert the front half of the split die ring aligning the pins in the back half with the hole in the front half. |

How to crimp – Step 5:
Position the fitting

Position the hose and fitting in dies from below. Rest bottom of fitting on die step using the PARKALIGN feature.
How to crimp – Step 6:
Crimp hose

Turn on the pump by pressing the “ON” switch. Pull the valve handle forward to bring the pusher down for crimping. When the split die ring contacts the base plate, the crimp is complete. Push the valve handle back to lift the pusher, open the dies, and release the finished hose assembly.
Note: You do not have to remove any tooling to insert or remove straight fittings. The front half of the split die ring and the front die train must be revoked to insert and remove bent tube fittings.
How to crimp – Step 7:
Measure crimp diameter

Measure crimp diameter on the flat surfaces after crimping the shell, referenced in the illustration to the left. Reference Parker Crimp Die Selection Chart for crimp diameters. Never use a hose assembly with an incorrect crimp diameter.
Important: Hose assembly must be inspected for cleanliness and be free of all foreign particles.
Hose insertion depths:

Parker Crimpers
Select a Crimper